Like older versions of Outlook, the Web version that comes with Office 365 lets users create e-mail signatures. These signatures can include anything from contact details to full company disclaimers, although it is advisable to have a link to a disclaimer, should it be too long.
Here are four quick and easy steps to create a signature on all outgoing e-mails:
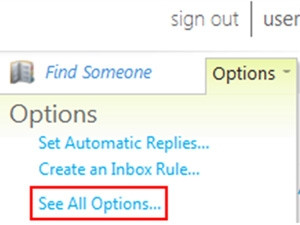
* At the top of the Outlook Web App page, click Options > See All Options > Settings > Mail.
* In the E-Mail Signature box, type and format your signature. If you use both Outlook Web App and Outlook and want a signature in both, you need to create a signature in each.
* To add your signature to all outgoing messages, select the "Automatically include my signature on messages I send" check box.
* Click Save or press CTRL+S.
Quick tip:
If you don't want to automatically include your signature, you can add it to a new message by clicking "Insert Signature" on the toolbar.
* Got any of your own tips and tricks? Send them to Sean Bacher at sean.bacher@gmail.com .
* Follow Sean Bacher on Twitter: @SeanBacher.
Share